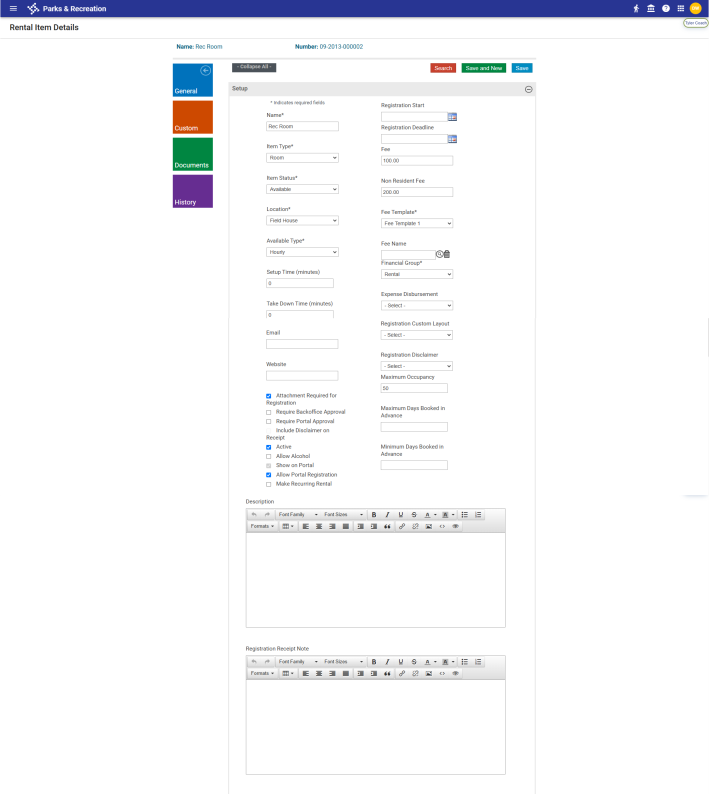
Rental Item Create/Details
Parks & Rec > Rental Item > Create (or Search > Edit)
The Setup fields provide the description, type, location and time buffers for setup and takedown and the associated fees for the item.
The Registration Start and Registration Deadline fields indicate when the item is available for rental.
Available for Hourly and Half-Day rentals, time buffers are blocked out for the rental registration process, ensuring the facility is not rented during those times; they also are taken into account for future rentals.
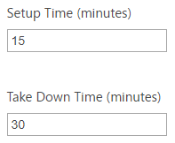
The Setup Time is the amount of time blocked out before the rental, and the Take Down Time is the amount of time blocked out after the rental. Buffer times are shown as shaded areas before and after rental times on the Rental Item Calendar.

Example: As the image above shows, if Setup Time is 15 minutes and Take Down Time is 30 minutes, the pre- and post-buffer shadings cover 45 minutes each to account for the setup and takedown times on either side of the rental itself.
If you were to click on a shaded area, a message would display to let you know the facility is not available for the time selected.
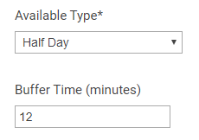
Selecting Half-Day as the Available Type displays a Buffer Time (minutes) field. The buffer time must be an even number of minutes.
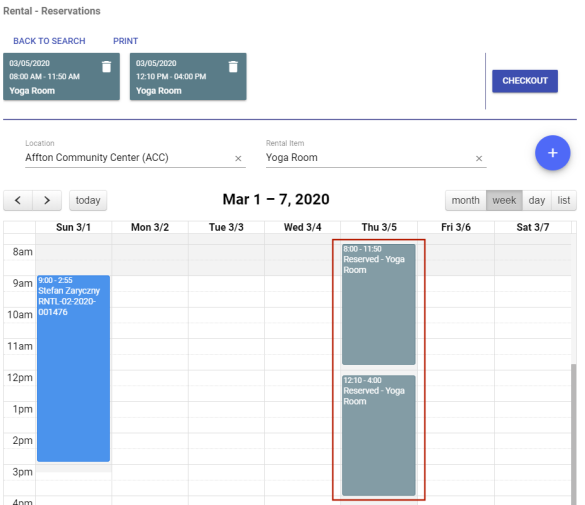
The time selected is blocked off and split between the first and second half-day available hours. As the rental calendar below shows, if the available hours for rental are 8:00 a.m. to 4:00 p.m., the buffer time for a half-day rental is 20 minutes and two rentals are scheduled for the day, the first half-day rental runs from 8:00 to 11:50 a.m., followed by a 20-minute buffer, and the second half-day rental runs from 12:10 to 4:00 p.m.
In addition to general rental information, the Rental Item Create/Details page provides options for determining rental requirements and assigning miscellaneous administrative settings:
|
Field |
Description |
|---|---|
|
Attachment Required for Registration |
Determines whether an attachment is required to complete the rental registration process from the citizen portal. |
|
Require BackOffice Approval |
Enables the approval workflow process for rental reservations for this facility or item and requires back office approval of rental reservations before payment can be taken. Reservations that require approval are shown on the Rental Registration Approvals page. |
|
Require Portal Approval |
Enables the approval workflow process for rental reservations for this facility or item and requires portal approval of rental reservations before payment can be taken. Reservations that require approval are shown on the Rental Registration Approvals page. |
|
Include Disclaimer on Receipt |
Includes the selected disclaimer text on registration receipts. The disclaimer notices set up for your organization are available in the Registration Disclaimer list. |
|
Active |
Indicates the item is currently available for rental. |
|
Allow Alcohol |
Indicates that alcohol may be served or consumed at the rental facility. This check box is applicable only for facilities where it is permissible to serve alcoholic beverages. The default value for this check box is not selected. |
|
Show on Portal |
If selected and the Browse Facility setting is enabled for the citizen portal, portal includes this rental item on the Browse Facilities list. |
|
Allow Portal Registration |
Makes registration for the rental item available from the citizen portal. If you select this check box and a user selects an available date for a rental item, the Register button is available. When the user clicks Register, the facility details are provided for completion. The rental item may be added to the cart, if applicable. Once the registration process is completed, the facility record is updated, and the rental status is set to Confirmed. |
|
Financial Group |
Identifies the financial source for the rental; for example, customer pay indicates payment is required by the renter. |
|
Expense Disbursement |
Identifies an expense disbursement method, if applicable. |
|
Registration Custom Layout |
Determines the layout template to use during registration. Only templates that have the Show for Registration check box selected are available. Use the Custom Fields and Custom Fields Layout options on the Administration tab to maintain customized fields. |
|
Registration Disclaimer |
Assigns a disclaimer to the registration process for the rental item. When you select an item from this list, the rental item details on the citizen portal includes a check box that the user must select to acknowledge the disclaimer. Select the Include Disclaimer on Receipt check box to include the selected disclaimer text on registration receipts. |
|
Maximum Occupancy |
Defines the maximum number of attendees who may be included in activities hosted at the rental facility. |
|
Maximum/Minimum Days Booked in Advance |
Defines the advance rental time frame for the item or facility. When the rental setup defines minimum days in advance for the rental item, facility rentals are restricted for the rental based on the advance minimum and maximum days. Using the Administration page, you still may rent the facility but will receive a warning message. |
|
Description |
Stores the rental description that displays on the citizen portal. This description should be brief but provide enough detail to ensure prospective renters know whether the item or facility meets their needs. The available formatting options for the description text let you set font type and size, add highlighting, and so on. When the text displays on the citizen portal, the formatting affects display. |
|
Registration Receipt Note |
Provides notes that are included on the receipt that displays in the citizen portal after registration, on the receipt that is emailed to the renter after registration, or on an email receipt reprint. The notes display in each rental registration section of the receipt. If multiple registrations include notes, the notes display with the details for each rental on the receipt. If you modify the receipt note text after receipts are printed, reprinted receipts contain the original receipt note. The available formatting options for the receipt note text let you set font type and size, add highlighting, and so on. When the text displays on the citizen portal, the formatting affects display. |
The Add-Ons fields assign additional rental items that are required or available to be rented with the main rental item; for example, if you have an available arena rental, you may make a Skate Shop add-on available.
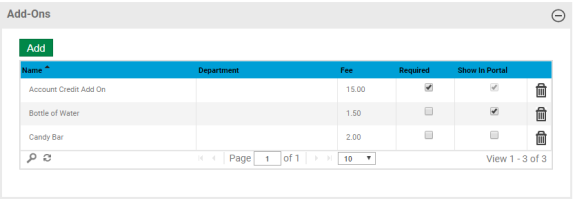
To make an add-on required, select the Required check box for the add-on item. In this case, the Required box on the Details page of the portal displays a default value of one (1), and the user cannot change it. If an add-on item or service is not required, the value of this box is zero (0).
When the Show in Portal check box is selected, the corresponding add-on item is shown during the registration process from the citizen portal. The check box is selected and disabled by default. To have an add-on item hidden during registration, clear the Required check box, then the Show in Portal check box.
If a rental or class registration is completed using the Parks & Rec application, the default value for the Buy check box on the Summary page is selected for required items.
To adjust the add-on fee for the specific rental, click the Fee field, and enter the updated cost.
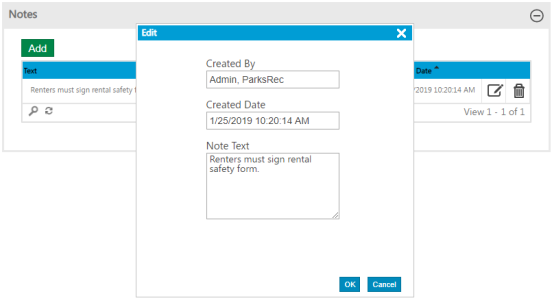
Notes provides additional information for the team. Click Add or the Edit icon to create or maintain notes.
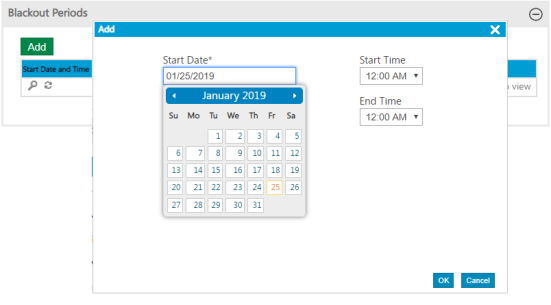
Blackout Periods defines times when a rental item is unavailable--for example, when a facility is closed for repair or cleaning.
The Hours table defines the daily schedule for a class. The default entry for each day is 12:00 AM to 12:00 AM. To define times, select the IsActive check box for the day, and then select the applicable start and end times.
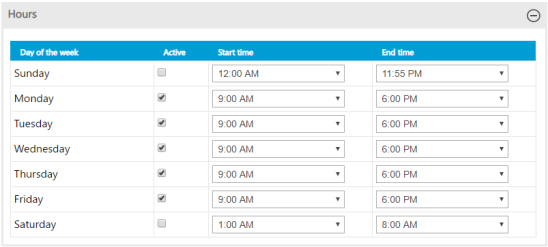
When you select a start time, the default entry for the End Time field is one hour later than the entry in the Start Time field, but you may change it.
If you select a start time, you must also select an end time.
The available time intervals--five, fifteen, thirty, or sixty minutes--are defined using the Time Picker Interval field in System Settings.
Through a tiered facilities feature, rentals may be tied to each other, creating parent-child relationships and avoiding scheduling conflicts.
The Parent Rentals table contains the rentals that are attached to the selected rental item as parent rentals. The table below shows the selected item is the child of two parent rentals.
![]()
Parent rentals may be edited but may not be added to the grid or removed from it.
The Child Rentals table contains rentals that are attached to the selected rental item as children.

Child rentals may be added, edited and removed from the table.
To add one or more child rentals to the selected rental item, click the Add button. A dialog containing a table of rentals displays.
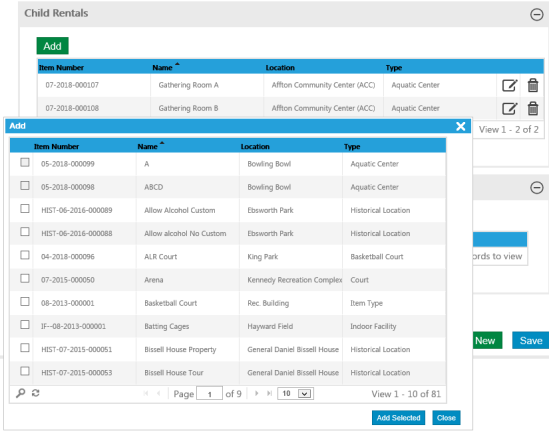
Select the check boxes next to the rental items you want to add as children, and click the Add Selected button. The check boxes for items that already have child rentals assigned are disabled.
When you edit a rental item that is attached to a parent rental, the parent rental shows in the Parent Rentals table.
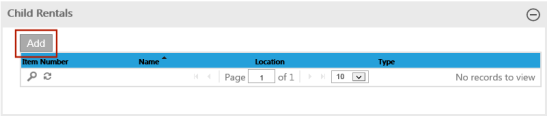
Note: A parent rental may have multiple child rentals attached, and a child rental may be attached to multiple parent rentals, but a rental may not be a parent and a child. As the following image shows, if a selected rental item already is attached to a parent, the Add button for the Child Rentals table is disabled.
If a child rental, such as Gathering Room A, is scheduled on the Rental Item Calendar, and you attempt to schedule its parent rental, such as Gathering Great Room, for the same time, the Gathering Great Room will be unavailable, since one of its children has been rented, as the following image shows.

The same holds true if you attempt to schedule a child rental the same time as its already-scheduled parent rental.
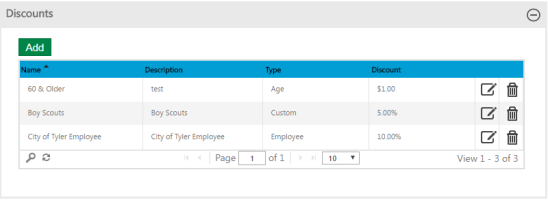
The Discounts table displays the discounts that have been set up in Administration and applied to the selected rental item.
Clicking the Add button opens a dialog of the discounts that are available to be applied to the rental item.
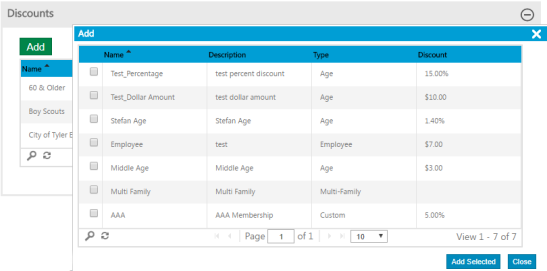
To apply a discount, select the corresponding check box, and click Add Selected.
Clicking the Edit icon opens the Discount Details page, where the details of the discount are available for editing.
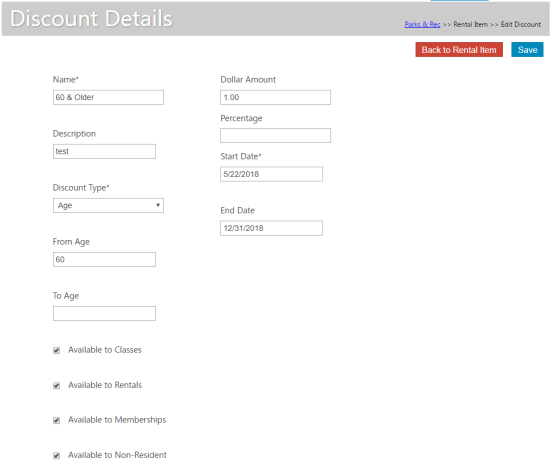
To return to the Rental Item Details page from the Discount Details page, click the Back to Rental Item button.